Driver side lower front arm has a bit of a refurb and is ready to go on. A bit more than I anticipated but done none the less.
I love tools. Even the kids the work for me. I absolutely don’t need some of the high end stuff I get but I like to use good tools and I more or less collect them. Things I use that may not be available anywhere but the tool truck. You certainly don’t need tool truck tools to work on your classic Mustang (or pretty much any classic). Way back when I did an engine swap in the first car I owned a 69 Datsun 521 truck with a basic set of Craftsman hand tools and a rented engine hoist. A good set of combination wrenches, pliers, screwdrivers and sockets will get most things done along with a hammer or two and a voltmeter.
These days a set of Harbor Freight or Kobalt tools and you’re good to go. HF has come a long way since I first visited the Tacoma store nearly 20 years ago. There are still some things that aren’t so good at HF. Here are a couple.
The presses are a good value. The press plates are junk and potentially dangerous. There are many stories around the web about them breaking. Here’s mine.
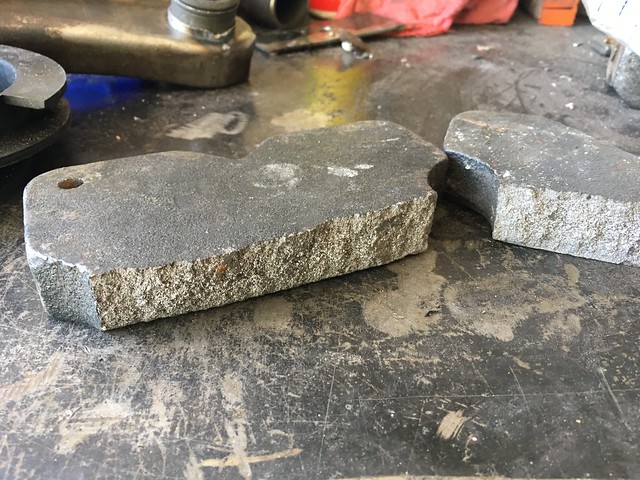
That was pressing the bushing for the arm that I just finished. It didn’t hit me, just a sharp pop. I should have known better than to use them though they’ve worked for several years. Swag Off Road has a great set of replacement plates. The press in and of itself I think is a great value. I couldn’t build it for that price. It’s not a Dake or Edwards but it’s not priced like that either. Been great in the small/home shop. Here’s a link to the Swag plates which depending on the size are as much or more than the press. Good quality 1″ thick plate with machined faces. http://www.swagoffroad.com/MACHINED-ARBOR-PRESS-PLATES-PAIR_p_7.html
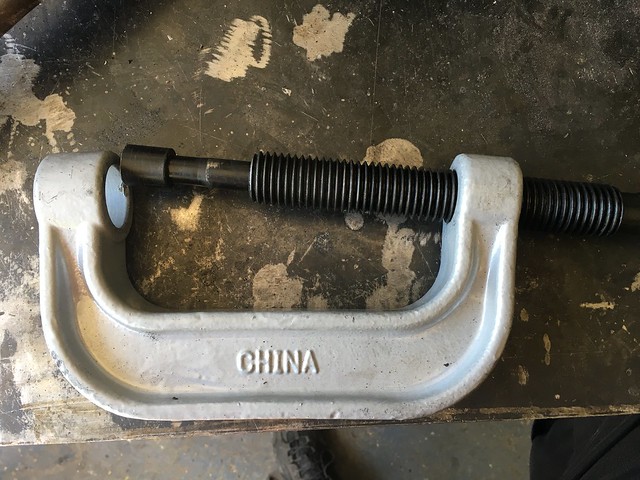
Another Hf tool that didn’t last under heavy use was the 3 in 1 service set. I used it several times but when it got to removing some bits from a rusty 96 Ranger desert toy it had enough. That would have been nasty if that would have snapped. I’ll probably just get a new one from HF. The mega duty set on the truck is just over $600. If I were a pro doing it a few times a week it would be worth it. Right now as long as they don’t start snapping on me it’s OK if I need to get one every few years.
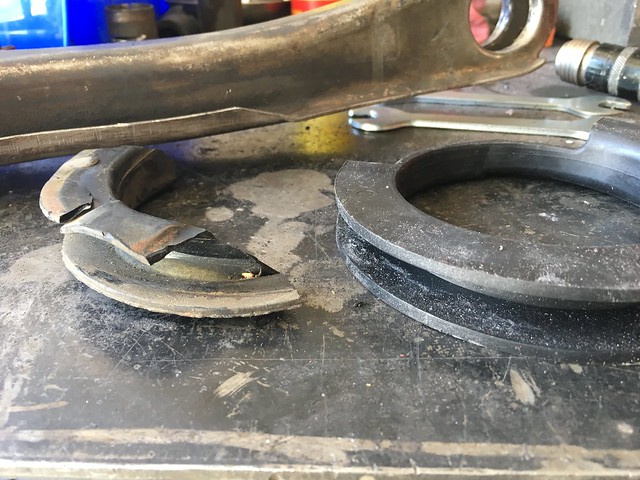
I was waiting on new spring isolators before I started putting the driver side front suspension back together. When I took the originals out it looked like they were molded plastic instead of squishy rubber. I just touched it to see what it was like and it cracked in half. Fifty plus years will do that to you. And to the original Mustang parts.
As covered in the previous post the driver side lower front arm was hammered. Long term it will be replaced. I’m not fond of the stamped assemblies anyway and while I wait to decide if I’m going to build a suspension to replace it I refurbed it and will put it back on the car. I was able to get a good part of the nasty twist out from the failed bushing and removing the bushing shell. It’s still got a warp in it, hopefully not enough so it won’t hold an alignment but at this point I don’t want to throw any of the cheap repro parts on it if Im going to fab something.
The rivets were drilled out to replace the aging dust boot. It’s easy. drill through the head then hit the head with a chisel bit on the air hammer and punch them out with the air hammer punch. There is supposed to be a cork gasket between the arm and the boot retainer. Mine was long gone and the new boot seals without it so I went without it.
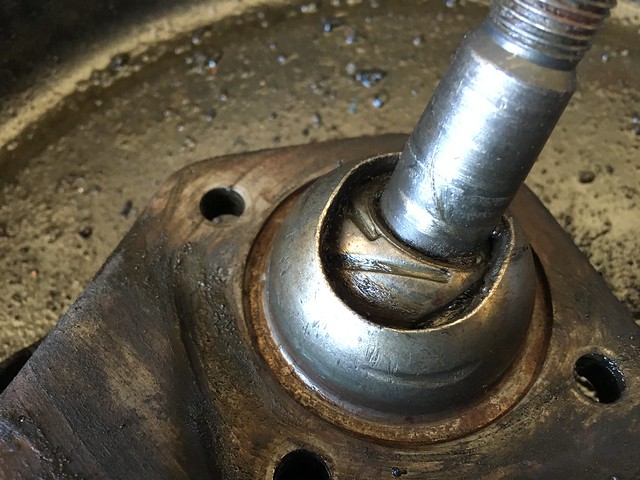
This is why some say not to pickle fork the ball joints from the upright (or knuckle if you prefer…) That boot was hammered before I hammered on it. You can see the gouges in the ball where the air hammer got away from me. The thing is a beast. The ball doesn’t catch or bind so it’s OK for what I’m doing now. Long term it’s done and needs new.
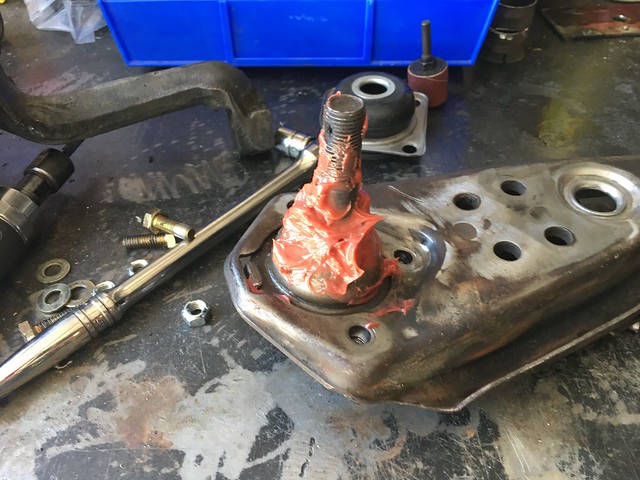
After cleaning off the big hunks where the fasteners mount Redline grease is applied liberally. I’ll finish filling it thorough the zerk once I get it mounted.
I’m using Grade 8 yellow zinc bolts and washers with c-lock nuts instead of rivets. If you aren’t familiar a c-lock nut is a locking hex nut that uses mechanical grip to lock instead of a nylon ring. Technically these are distorted thread lock nuts using a top lock method of thread distortion. That means you can thread them to almost the top of the nut before you hit the thread distortion. Most suspensions (or any demanding application needing a locking nut) use c-locks. Including the original suspension on this Mustang. The C in this case stands for Grade C nut which is equal to a Grade 8 bolt (about 150k tensile strength). For best results for high tensile strength fasteners it’s best to torque them. First because you need to make sure the c-lock is well clamped (it’s difficult sometimes to tell due to the resistance from the threads) and to make sure the fastener clamping force is optimum and you aren’t stretching the bolt though in this particular use case stretching won’t be an issue.
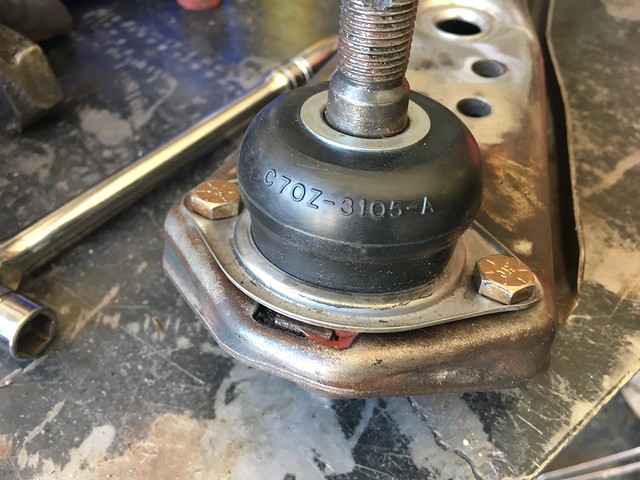
Done! The fitting of the bushing was a bitch. The end was twisted as mentioned when misaligned the centerline between the two sides that hold the bushing. I had to take a bit of Mr. die grinder and a cutting burr to clearance and chamfer enough away to get it to line up albeit some degrees off center. Then whack it into place with my big ass dead blow ball peen.
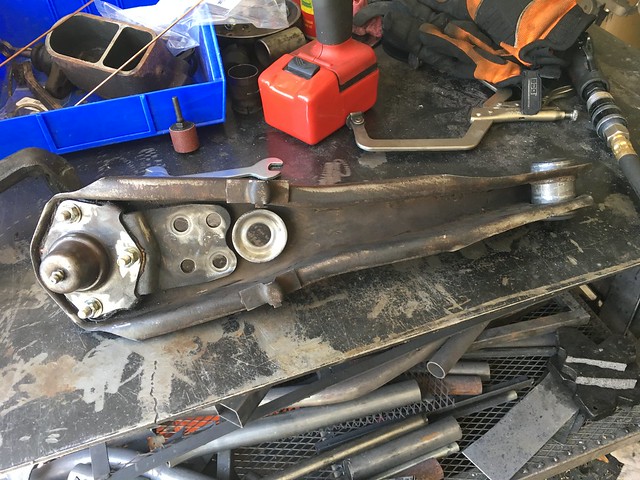
A bit of regular old Krylon primer to keep some of the rust away. This isn’t going to get a full finish refurb, only a mechanical one.

I did manage to get the gauge from Summit that was left out of the last order. It was missing from the original order and big kudos for Summit for making it right. I’ve used them for years for race parts and love them. This is the same VDO gauge we put in some of the race cars and the matching sender. It rocks. Can’t wait to finish the front so I can see what my water temp is really like.
