The heat is on

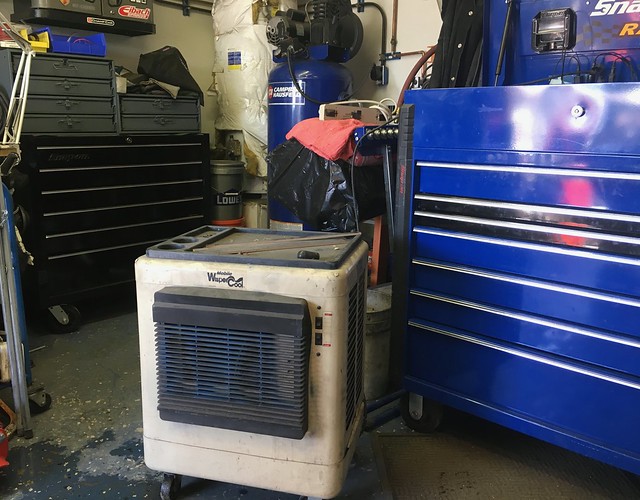
It’s that time of year where it’s getting hot. We’ve been kissing just below 100* outside making it just a bit warmer in the shop. It’s past the time I can paint and do body work (the catalysts don’t work properly at our summer temps). Paint and body are a long way away and I’ll have two collision shop jobs to tweak on. One not so bad, the other a disaster of a rear quarter repair. Looks good from far. But far from good.

Time for the Portacool…

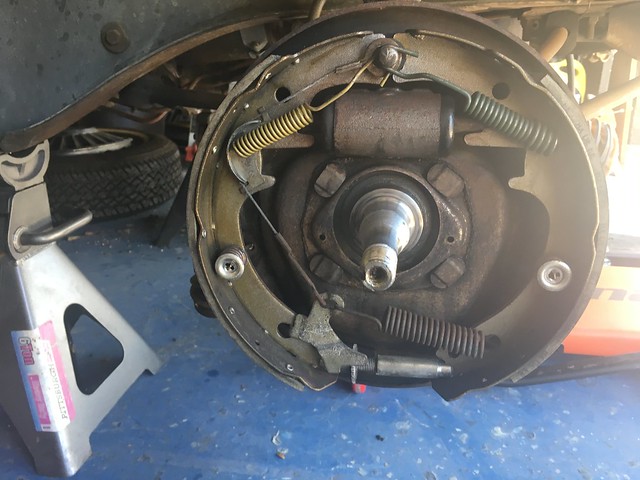
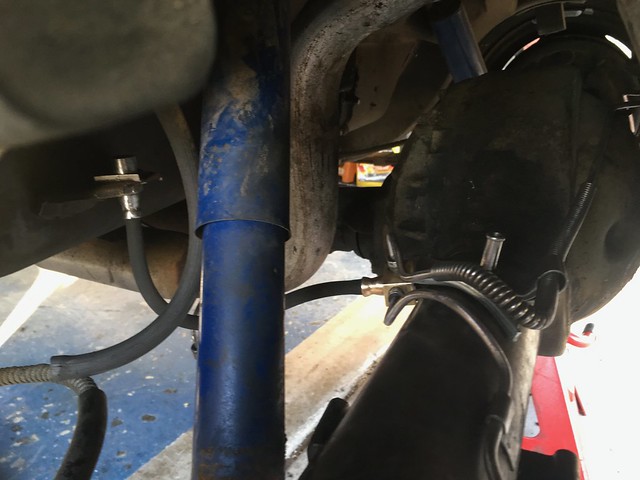
Finishing up on the brake system refresh it’s pretty clear that the fluid had set for a long time. The chunks in the bottom of the large chamber on the master cylinder are coagulated brake fluid. That would be the chamber for front disc brakes. This is an all drum brake car.

A new Cardone from CJ and all is well. The hardest part of the job is contorting under the dash. Looks like a dash creeper is in the cards for me. This was the first of many, many times I’ll need to be under the dash. I’ll likely spring for a standard Whiteside instead of the tool truck designed and branded unit. My understanding is Whiteside makes the version for the tool truck. The tool truck version can go to 30″, the standard is 24″. The difference in price is almost $200.

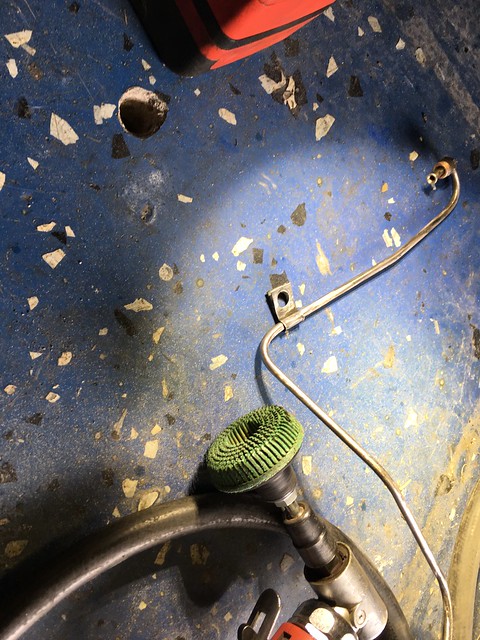
All of the lines and interconnections have been flushed cleaned and reassembled. The lines held up surprisingly well over the years. The only pitting of note was where the rear main tube turned up into the engine compartment and in the rear from the junction to the left side wheel. Other than that no kinks, creases or crushed lines. The sprials on the rear lines need a bit different media to clean them, one where the profile is vertical to the rotation to fit into the nooks and crannies without taking to much of the base away. They make a Sctochbrite bristle in that config but I don’t have any. By the time I got to it there was only an hour or so left to get to the local industrial hardware before the holiday weekend. And it’s packed here on Memorial Day weekend. If it wasn’t packed here we’d starve and I wouldn’t be able to have such an expensive, time consuming hobby.

I have some 2″ wire wheel discs that worked great on the line covers.

Here is the rear, cleaned, flushed and back together.

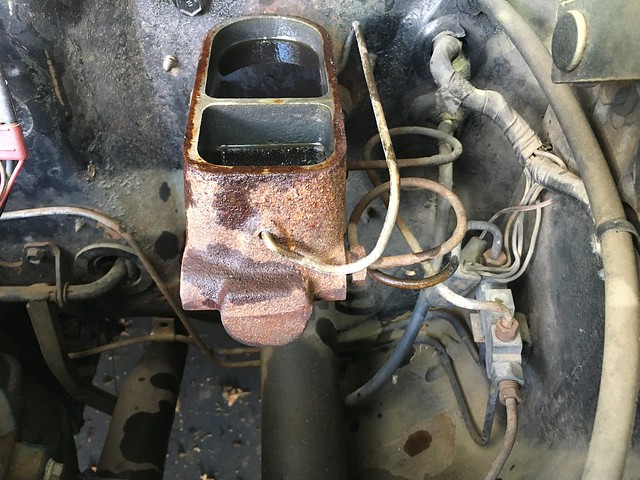
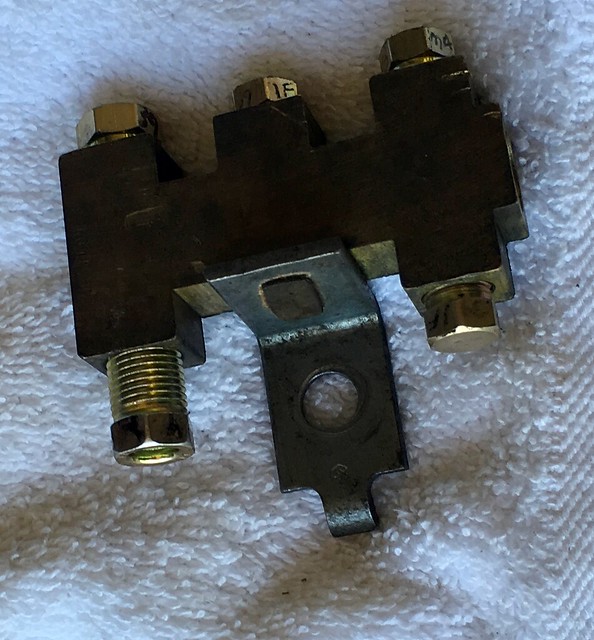
Everything is ready to go except the pressure differential valve/piping manifold. It’s the brass block next to the master cylinder that distributes the fluid and alerts to changes in pressure on either side that could indicate failure. It’s a mechanical switch that triggers an idiot light. Whomever did the last brake job apparently broke it and the switch port has been open for who knows how long. At least 11 years at this point.

Best I can tell that particular single conductor switch and the housing were used only in the 67 model with later years using a different two conductor until ’79 or so according to parts references. I couldn’t find any NOS or used switch blocks/manifold and only a couple switches correct for 67. You can make other years work or use fittings for distribution and forgo the warning light (if you can’t tell half your brakes have failed you shouldn’t be driving…).

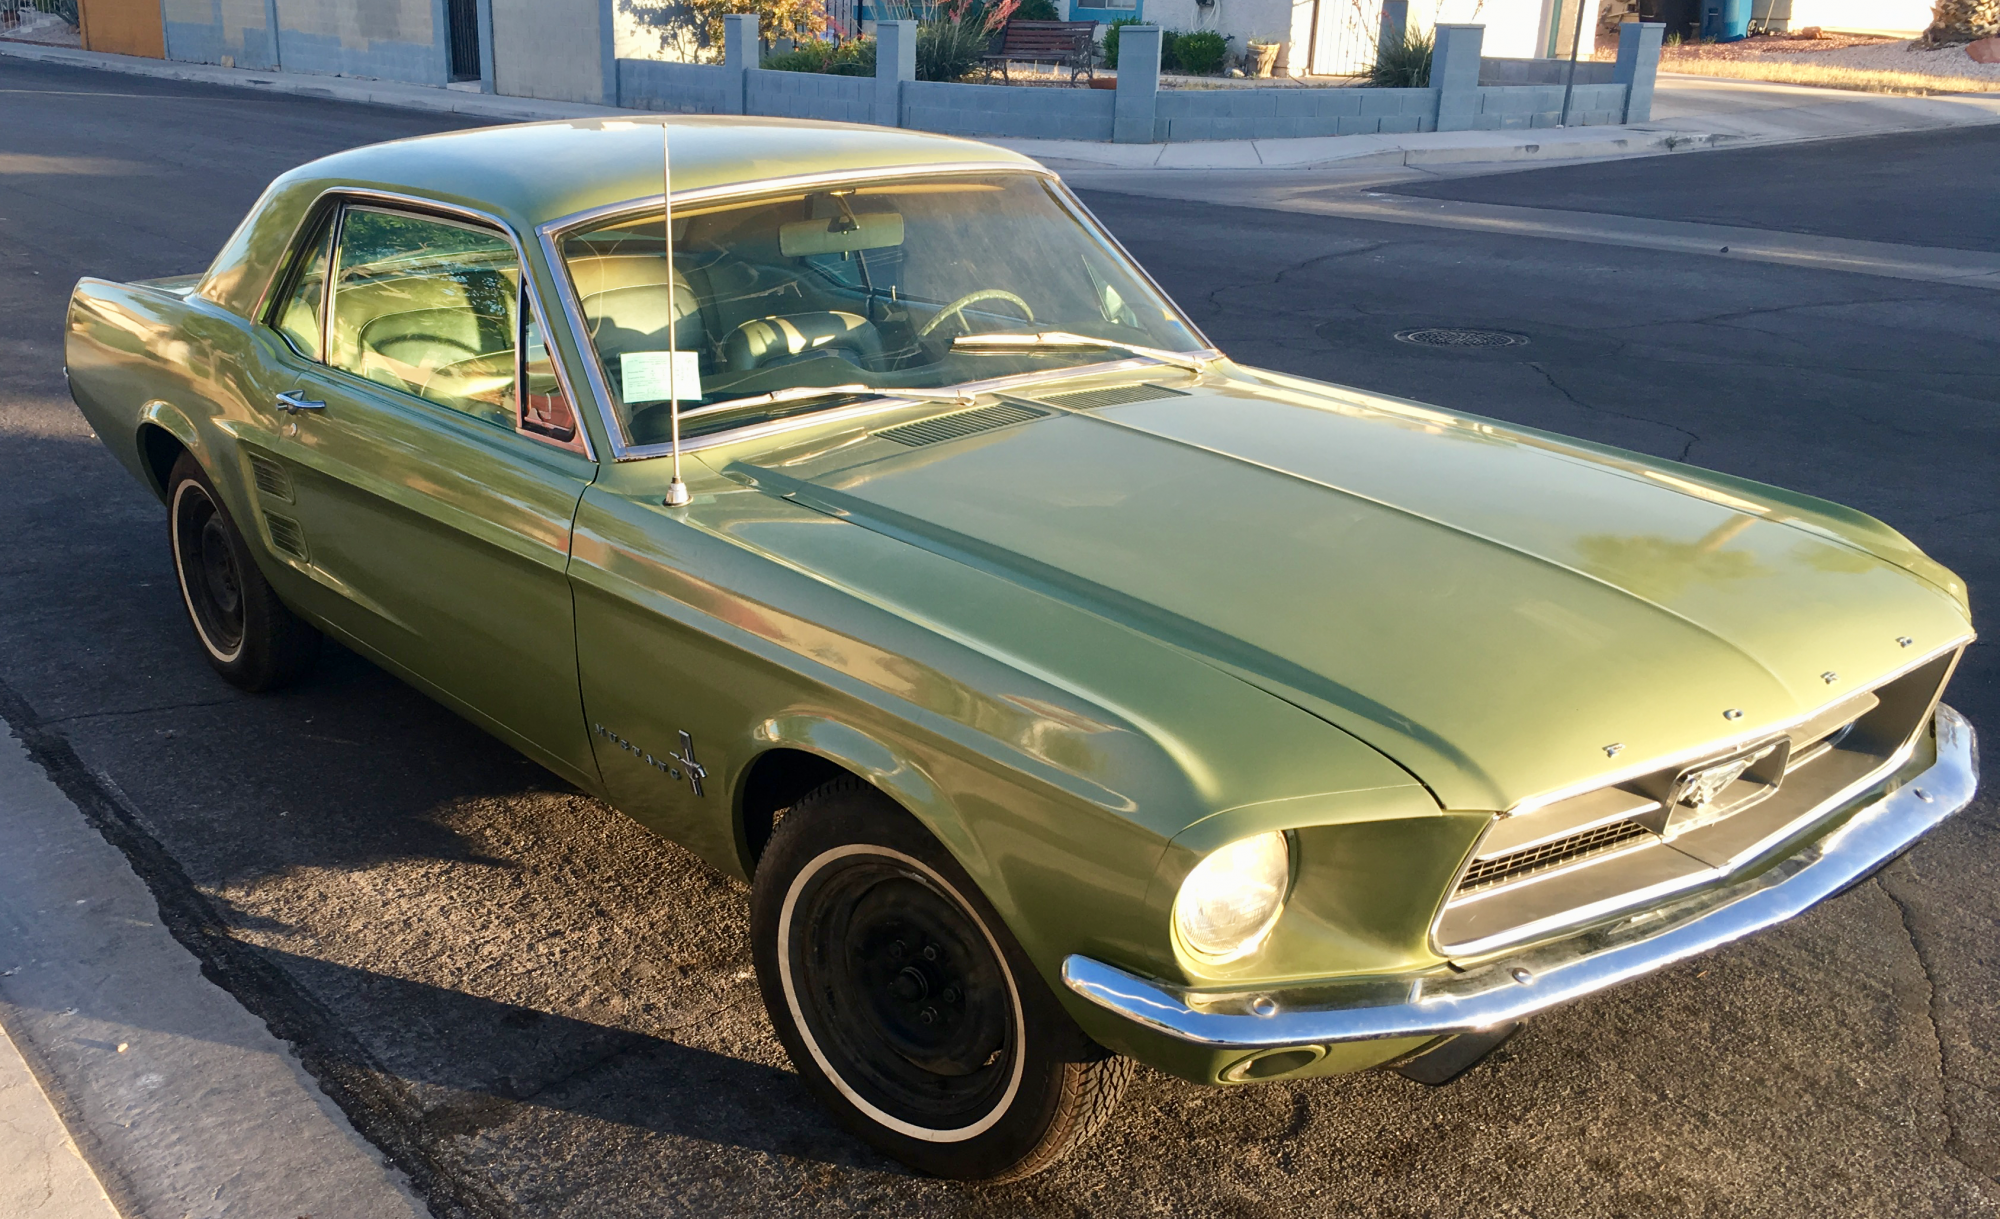
The goal here is a historically correct representation of the car as it would have been a year or two after it was purchased. They won’t pick me for Pebble, I’m not going to show at an MCA and Carini isn’t going to show up at my barn. Mostly because I don’t have a barn and I don’t think he likes America muscle cars anyway.

That means rebuild the switch block. First up, get it out of the car. Easy enough. Next remove the plastic threads that were broken inside the block by scoring the edges of the plastic with a small chisel and using a large tip slotted screwdriver to turn it out. The plunger that activates the switch is stuck. I mean stuck. First I plug all the openings except on to inject air, 150 psi, into the housing to dislodge it.

Not even close. The air whistled right past the seals on the stuck piston. Now on to plan B. If at first you don’t succeed try again. With a bigger hammer. I got out the air hammer and the new nylon tips I got not too long ago. This is a tool truck only thing as far as I can tell. The hammer bit uses interchangeable tips. They can be this plastic sort of nylon, steel or aluminum. I use them on the fabrication side to planish bodywork and like shaping or if I just need to hammer the heck out of something.

No go. Even after a few tries. Someone here at VMF suggested to someone else in another thread from long ago to drill it out. I can’t use it as is and if it’s stuck and I break it so what. So on to the drilling portion of the job. I got a drill size just a shade bigger than my skinniest pin punch, 3/32 or so, diagonaled the center of the block, chucked it in the drill press and went to town.

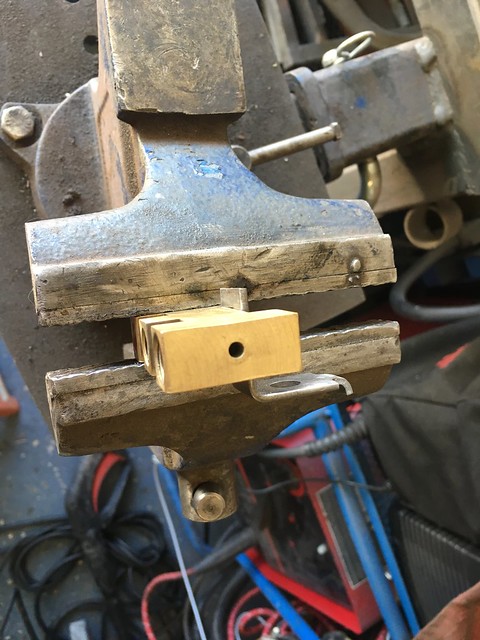
I give it a light but firm whack with the pin punch and a 16 oz ball peen dead blow. No move. Next a more decided whack with that same punch and a 24 oz straight ball peen. It took another almost robust shot to get the piston/pin out. It was cooked. The scars on the bottom of the piston are the punch marks from knocking it out.

A rebuild kit from NPD with the screw in stud to hold it in place while bleeding and we’re good to go. Except for that hole in the end of the block.

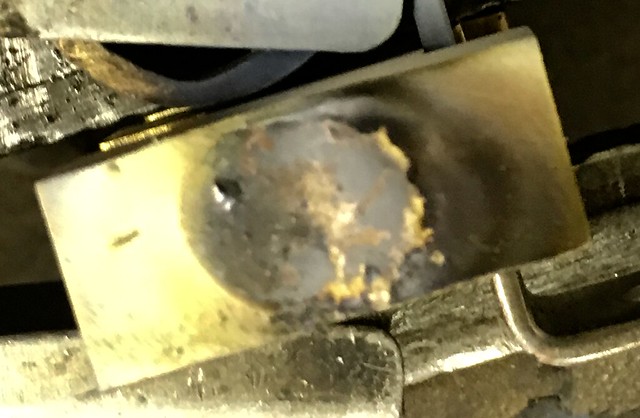
In the thread where I got the drilling idea one of the suggestions was to use a plug and JB Weld. Like me that’s pretty shade tree but I wanted something a bit cleaner. So I decided to tig weld it. Not that I’d never welded brass but I’ve welded plenty of other metals. Like Liewellyn Moss, “tig, mig, stick, all of it…”

With some tips from Welding Web and Jody at Welding Tips and Tricks on You Tube I figured that I’d need to use either aluminum bronze or silicon bronze as the filler metal. Like AL it will be hard to heat at first but once it is it will flow like a demon. I did a test run at 80 amps on some flat steel stock and the filler. Seemed OK. I was using lanthanated tungsten, argon and AC voltage on the welder. An 80 amp pass wasn’t going to cut it. I tired a few more then pre heated the block for a few mins with a mapp gas torch. I then hit it with 150 amps and presto, it worked. It’s an ugly bead, that’s the nature of brass and it gasses off something fierce. But it works.

It will need some refinishing to bring it to a good look. I used 80 grit Roloc flap to knock the big chunks back and finished it with maroon Scotchbrite.

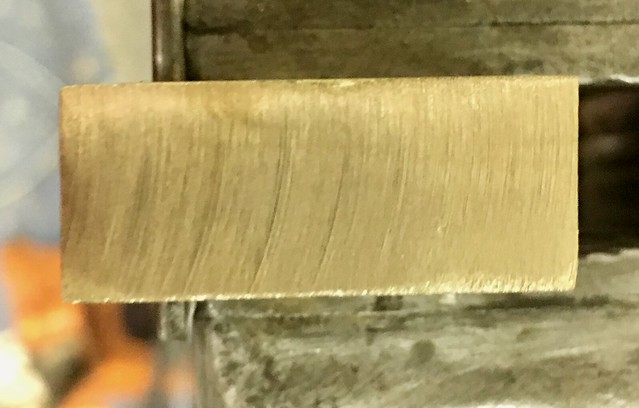
I’ve still got some cleanup to do in the block. There is a small nub that hangs down from the repair into the cavity. Probably won’t impact performance but I’ll grind it out with a ball cutting end mill then finish the cylinder cavity with 1000 grit around a drill almost the size of the bore. It will be like honing it. Between sticking the piston in there and the gassing out of the piece during the repair I’m sure it could use a good resurfacing.

If all goes well I should have a refurbished brake system on the car sometime Memorial Day.

It runs, drives and mostly stops

The revamp of the ignition and cleaning of the tank got it back on the road. The tank came out better than I expected. With a bit more work I could coat it and use it. After soaking in my mixture for a couple of days, draining then letting it sit outside for a couple of almost 100* days the remaining gunk balled up and was able to be vacuumed from the tank.

Other than the lifter it runs fairly well. Could use a carb tweak here and there but not bad for spraying with carb cleaner after 11 years and cleaning out the fuel system. Refurbed the accelerator linkage with new parts as well as the kick down. Got the Mannel engine book for the historical perspective to get it back to having the correct parts.

Started collecting original parts for the A/C. Can’t really enjoy a car too much in the summer here without A/C. Rather than put a Classic Air or like system in I’ve decided to get the stock parts and refurb them or get repros. I’ve got the entire blower assembly. Works great, a little worn looking but after 50 plus year not too bad considering. Just like it’s owner. Next will be the hunt for the heater box/evaporator assembly then the condenser and pump. A/C won’t be done for this summer. Too much basic mechanical for reliability before I start that.

The initial plan was to get the brakes working well enough to get on the road. Once I got into it and saw that it didn’t have the correct master cylinder for manual drum/drum and the condition of some of the lines and the pressure differential I’ve made another “while I’m here” decisions. It’s also the first “wow those are hard to get and expensive” moments. The pressure differential switch was broken off. It’s the 67 single pin switch. Looks like that’s the only year they used that particular switch. NOS is $125 and reconditioned is $45. If you can find them. I’ve found one of each. The manifold/distribution block for the pressure differential switch needs a rebuild as well. Those parts are easy to find, two seals and a crush washer. The piston is stuck toward the inside. I’m going to make an air fitting and plug the other holes and see if I can blow it out. It’s soaking in Berryman’s right now trying to loosen it up. Otherwise it’s drill a hole, use a pin punch to get it out and fill the hole by TIG welding the brass and resurfacing that side of the manifold.

Not the right master cylinder…

Got a choice of air cleaner assemblies. The standard corporate blue and another that’s gold with a 289 4v sticker. I’m not sure the gold one is a 67, looks like it could be more like a 65 with a repro decal. My understanding is that after 65 the engine colors were standardized. Either way I’ll get the one that fits the year and paint it the appropriate color. The gold one has a new air filter and either a repro or NOS breather with the decal stashed inside the assembly.

Brakes don’t look too bad. Rears look better. Looks like newish hardware, shoes are good, the movement of the mechanicals are good, seals on the wheel cylinder look good, no leaks. It stopped but way soft pedal. I could lock them but the pedal was almost to the floor. The fluid looked like Coca-Cola but sure didn’t taste like it…

The front drums had rust in what looked like either water collecting or it was up that far in snow each winter for a decade. It was in a garage that was more like a carport to conform to the association’s rules. It was in the sticks but they still had an HOA. Based on some of the other rust at that level particularly the front valence that it sat in snow for a while. Each year. I used some Scotchbrite to see if the worst of it was pitted too bad to turn. It wasn’t bad. My engine machine shop doesn’t do brake drums/rotors and recommended the local driveline/rear end shop. Didn’t know they did brakes. They did a fantastic job, $39 for both.

I’ve started refurbing the lines (should have the other parts in a few days). I use Scotchbrite bristle Roloc on a 90* air die grinder to knock the big hunks off. Then I use Scotchbrite maroon and brake clean to finish it off. The insides are blown clean with my tank gunk mix and air. I check the pressure to make sure it’s not clogged by putting 10 psi into the line and reading what comes out the other end.

Old school meets new school. I’ve been using a computer in the shop for the last 8-9 years. The last two builds I did and the daily I service didn’t/don’t have paper manuals at all.

Here’s what the front suspension looks like now. After brakes it will be the steering. I’ll drive it enough to get it registered then start in on the front suspension refurb. It will be a big one. Ball joints, bushings, knocking the gack off. I’m going to do my own roller spring perches. That’s the kind of thing we do on race builds. I’ll do the Arning drop and get a 1″ bar. Other than that I won’t do too much except for shocks.

Here’s how another fine day working on the car starts

Car runs pretty well but has a bit of valve noise. Seems to be on #1 intake checking by ear and with a stethoscope. There is play between the push rod and lifter. Pulled the rod out and buffed it off to give it the roll test. Passed the roll test fine. Did the exercise of the top of the lifter, seems to hold pressure now. Fired it back up and no lifter noise. Throttle tested and the lifter tick came back. I really didn’t want to go into the bottom end. We’ll back burner that for now.

The throttle linkage assembly is pretty well worn. When I got in the driver’s seat to give a few revs and imagine what it’s going to be like cruising down the road as soon as I finish I noticed there wasn’t enough pedal travel to rev the engine fully.

It’s supposed to spec at 4″-4-1/2″. This, well, is not. It’s pretty 50 plus years of rust. The reason the idle was so high was the linkage wasn’t returning flush against the dashpot. When returned to the proper off throttle position it more or less purrs. Particularly after 11 years on blocks. With a valve tick in #1.

Another peeling of the onion. I can restore the accelerator links, just need some of the grommets, springs and washers. Kickdown too. I’ll take all the metal parts down to bare metal and power coat them. The black is easy enough for the pedal link but I’m still trying to decide something for the linkage rod. Perhaps a natural type metal color. Dashpot needs a spring so I’ll start trolling around here to see what my options are. Between our local industrial hardware/machine shop supply joint McFadden-Dale and McMaster-Carr I can just about get any kind of spring (or other hardware) I need. Would be nice to get “the one” for the dashpot. Checked Champion, they don’t have it. Or CJ or NPD. Or one of them had it and I couldn’t find it. Regardless, the throttle linkage project will be easy.

While it was running I got some heat images. The device isn’t a contact thermometer but rather a thermal imager. It measures radiated heat fields rather than specific temps. This takes into account the ambient temp as well. So when it’s 100* outside, like when I took these images, that’s factored into the image. The benefit of the tool is to read the difference in heat signatures on different parts of the engine rather than getting a specific temp reading. Because the imager averages the heat field if you need more precise temps of parts you’ll still need an IR thermometer. This is the front of the engine. There were some overheating issues prior to the car being parked. That lead to a 3 row radiator being installed. From running for 10 mins with these images it looks as expected. It’s something I’ll need to keep and eye on once I get the car back on the road.

Once the tank pickup/sender and linkage parts get here I’ll be ready to put the tank back in and go for a road test. Hopefully I’ll see them in the next couple of days.

It’s alive…

Running from a gas can. Needed a battery, wires, coil, plugs, points, condenser, cap and rotor. I didn’t want to wait for the Pertronix so I went old school. I grew up on carbs and vac advance distributors. Initially I did plugs and wires. The plugs were pretty carboned and the field mice got to the wires. No spark though. Coil tested fine and I didn’t want to test the secondary parts so I just did a “parts dart” on the rest of it. The points looked to have been rusted together and all the other parts are consumables anyway. After that it fired right up. I was turning on the key so I could hook up the remote starter and see if I had spark and I pushed a bit to far and it caught and fired right up. I wasn’t expecting it to fire but it did.

I prefer NAPA for OEM type replacement parts rather than one of the other chains. I do have a 24 hour Autozone about a mile away for the late night sessions. I got an Exide 24FX at Home Depot to save me the drive to Pahrump thanks to a tip in another thread. Eventually I’ll get one of those fake Autolite tops and decals to give it that period feel. A new NPD generic sender/pickup is on the way. Tank will be good enough to use but will get replaced once I get everything up and running. It’s clean enough to use now but has some aggressive rust in the upper corners of fill side of the tank. It’s going to need to be coated so I’ll just replace it a bit down the line.

It’ll buff out…

Yep, sender is toast. That explains the reading issues. Not only was there no float, the arm was stuck in one position. The collision shop of years back didn’t replace the tank as thought. It’s the original tank and sender. They also didn’t use the right screws for the filler neck to rear panel, use sealer when the tank was reinstalled and didn’t use a filler neck gasket. They did paint some sort undercoating on the tank. It neither matched the color of the rest of the car even accounting for age and wasn’t the same texture. Made it look somewhat new from the bottom of the car. It’s the same as they used in the collision damage area under carriage so I don’t think they were trying to pull a fast one. No tank on the invoice either.

The tank is salvageable. I’m on the second step of a three step process. First rinse with methylene chloride. It’s the active ingredient in Ben17 paint/power coat stripper. You dunk it or brush on the paste form and even the most adhered powder will come off. Or paint, or any coating including ceramic engine or chassis paint. It’s great. It’s also nasty to work with. Full PPE. Doesn’t treat rust though. That got the big chunks of gunk broken up and out. Tape up the orifices, swish it around, no BBs or hardware needed to break it free. https://www.bencosales.com/powder-co…ating-stripper

The next step is POR15 cleaner/degreaser. (used to be Marine Clean) It’s basically lye and butoxyethanol. Not quite as nasty as you mix it with hot water from 1:1 to 5:1 but try not to get any on you. It’s in the second soak now. It will etch the remaining surface rust as well as break down what’s left of the fuel gunk. Once it’s clean I’ll convert what rust is left with a rust converter. The commercial products are largely the same active ingredients, tannic acid and butoxyethanol with some other acids to lower the ph to speed the conversion. Eastwood has a good one. I like it. At that point I’ll water test it to make sure there are no pin hole leaks from treating the rust.

If you are going to buy the chemicals or if your tank is bad enough it can’t be cleaned or has too many pin holes it’s going to be cheaper in the long run to buy a base level repro tank. Unless you’ve got a rare candidate where you want to keep as many original parts no matter how you have to restore them. I have both Ben17 (and Ben15) as well as the rust converter. It’s a standard thing for me to use. The POR15 cleaner I bought, about $9 at the local auto body/abrasive supply shop.

I’m at the first “might as well do it while I’m there now” moments. But I’m going to resist the urge to do it. For now. The urge is to go ahead and paint the trunk. As a bonus my tank dampening mat and the original plaid trunk liner are in fantastic shape. For this my first choice is Deltron DBI, the PPG paint for underbody and interiors. Single stage, matte finish, don’t have to clear it. Though for about half the price I can do it in a single stage TCP Global urethane.

The plug wires will be here tomorrow. Change the fluids, rustle up a battery and I should be good to go to get it started. The brakes look good, they’ll need new fluid and a bleed. Once it starts, runs, drives, stops I can get it the 8 miles or so to the DMV for a VIN inspection.